Upload a Snapchat Geo Filter
You’ve created your gorgeous new filter for Snapchat with Filter Mason, but there’s a few more steps to finish the process.
First things first, you’ll need to be on a desktop or laptop, as Snapchat doesn’t currently have any other way of uploading filters. Another thing to note is that this will cost a little money. Snapchat employs hundreds of people to make the app fun and free to play with, so this is one way they make money to keep the lights on, but we promise, it’s very inexpensive.
We’ve sent you the graphic you’ll be uploading. Some things to note:
- There is no guarantee that your filter will be approved. If you used more than 1/3 of the screen with graphics and text or have something inappropriate, they reserve the right to reject your filter.
- The approval process takes time. Technically you can request approval up to 24 hours ahead of time, but we recommend 48 hours.
- You’ll be drawing a shape on a map to tell Snapchat where the filter needs to be active and when.
Step One: Upload Filter
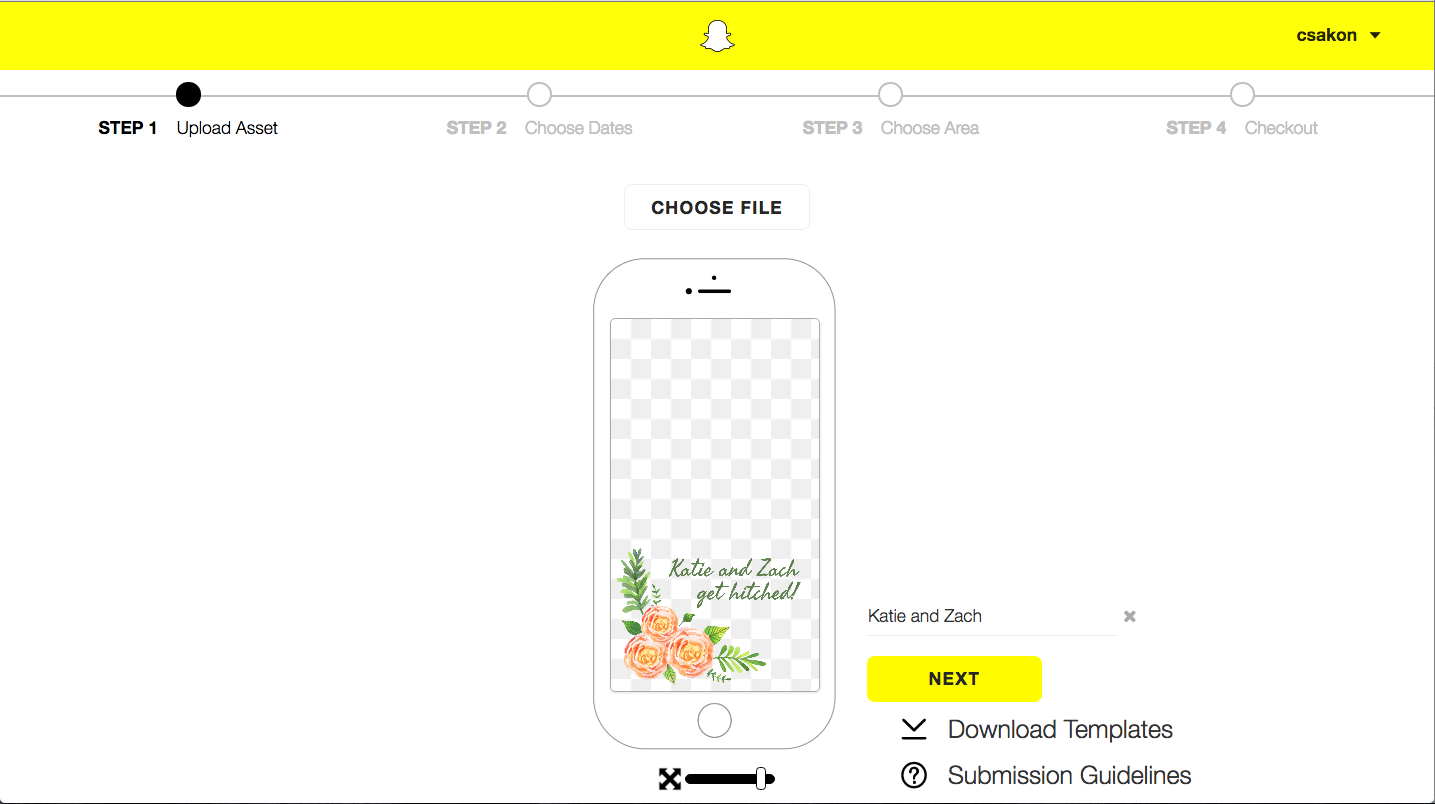
This is the easiest part as we’ve already done the hard work for you. The image we emailed you is the right dimensions, resolution, and size Snapchat requires. Login to Snapchat’s website and click Create Now then click Choose File and upload the image we attached in the email we sent. Then, name the image for easy reference and click Next.
Step Two: Set Timeframe
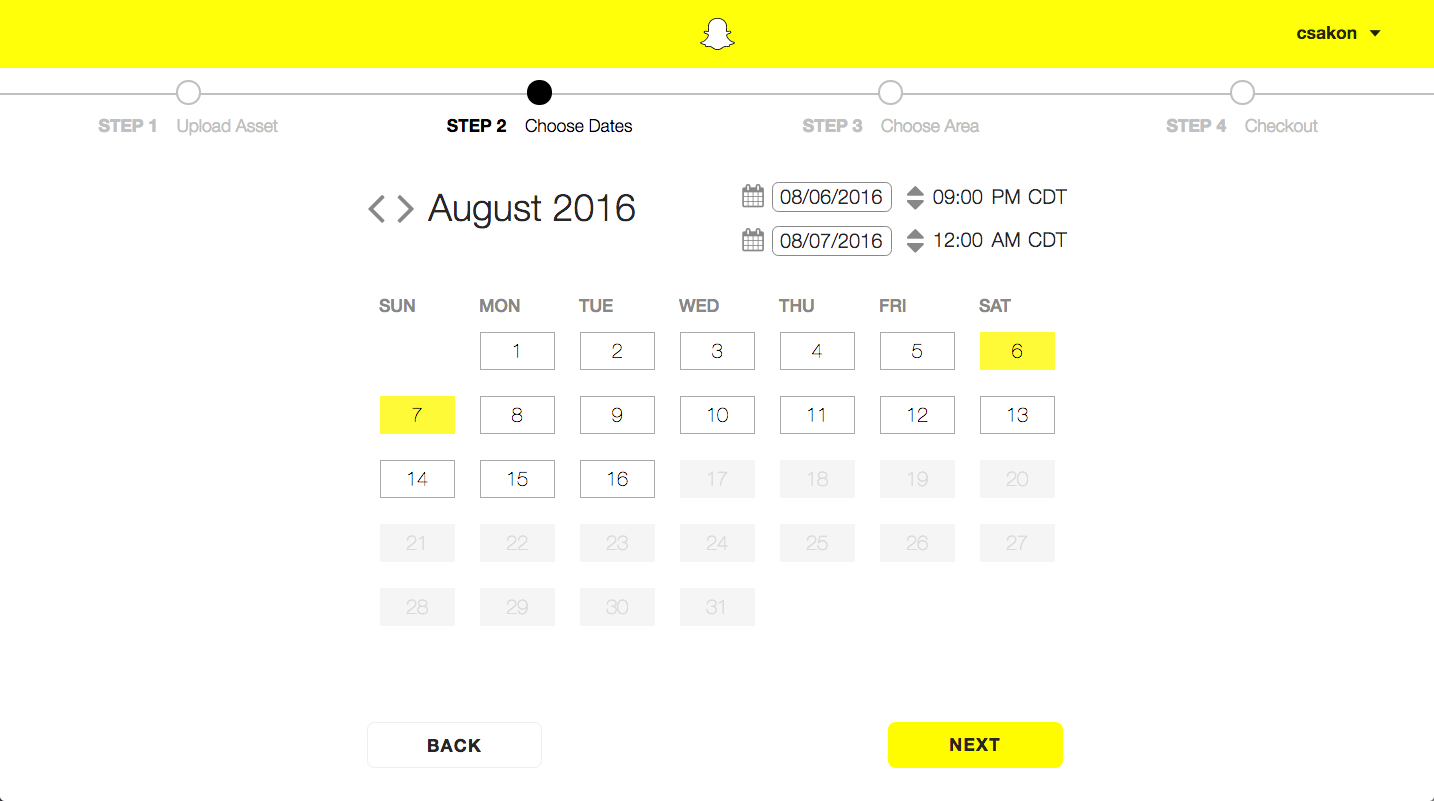
Filters run for a preset amount of time. Click on the day of the calendar you want to start your filter and then select a start time (while making sure the time zone is correct). Then click the end date (midnight is the next day) and select the time your filter should stop running. Double and triple check the dates and times to be absolutely certain your filter runs at the times you want. Then click Next.
Step Three: Select Area
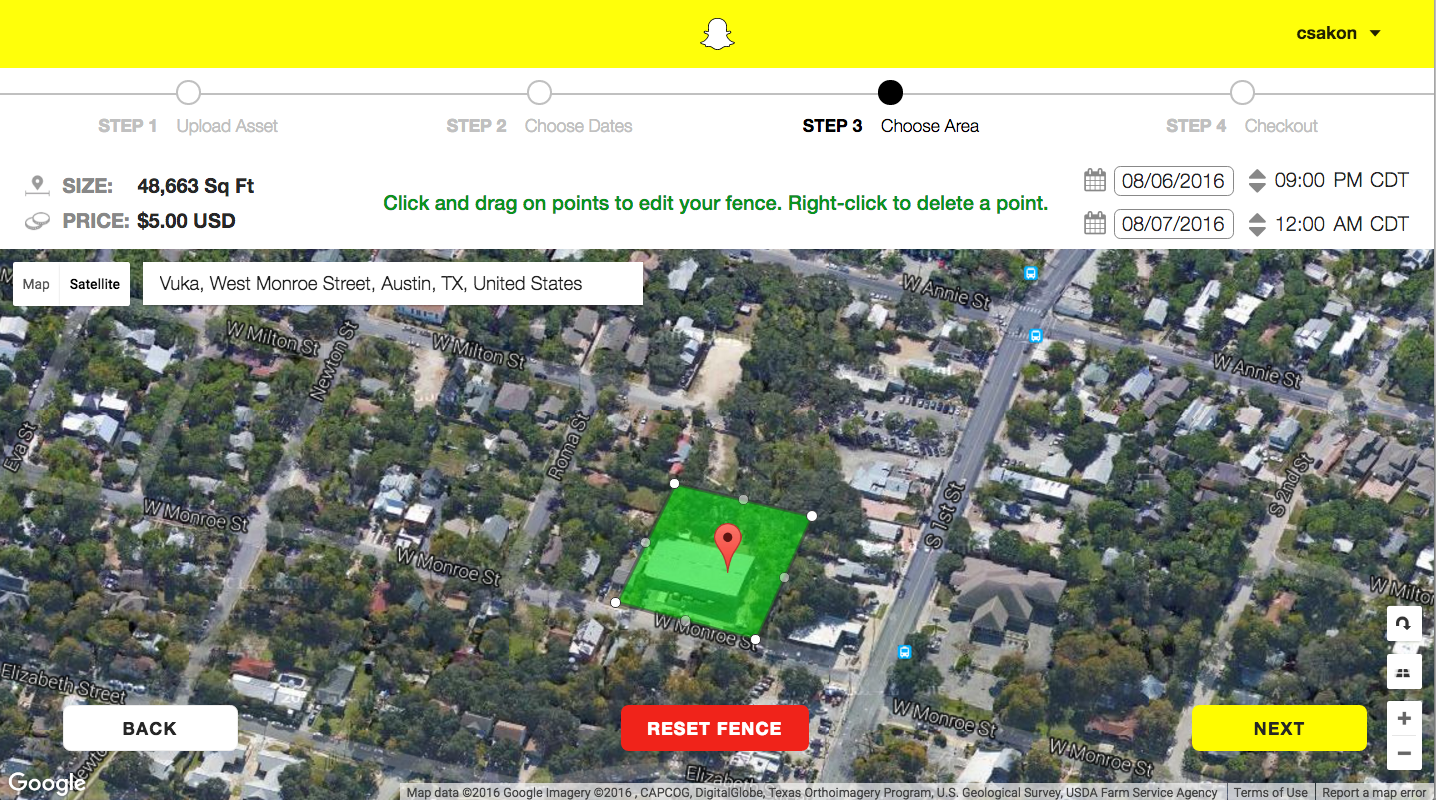
Type in the name or address of where you want your filter to run then click around the space to draw a fence. Snapchat doesn’t force any standard shapes, so feel free to trace the exact borders of a building or park. Geolocation isn’t exact, so make your fence a bit bigger to be on the safe side. It’s helpful to switch between Map and Satellite view to make sure you’re containing the whole area you want, especially if there are backyards or areas the Map view doesn’t clearly show.
Step Four: Double and Triple Check
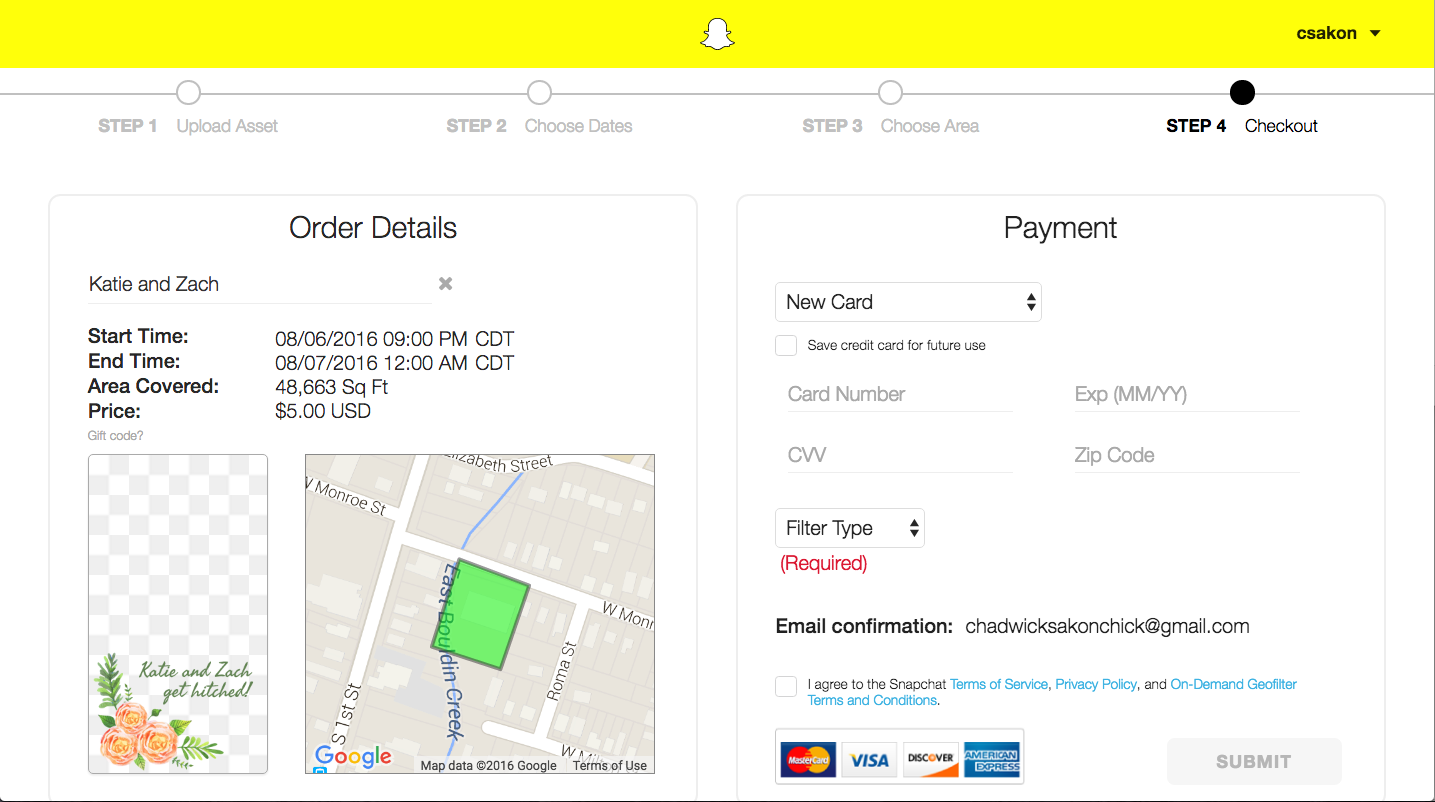
We’re almost done! On the left side, make absolutely 100% sure that the filter, date/times, and geofenced areas are exactly right. Then ask a friend to double check your work because your eyes are probably playing tricks on you. On the right hand side, put in your credit card information and select the Filter Type (Personal or Business). Note: Snapchat’s approval team is made of humans. If your filter has an inside joke/nickname written in text and the approval team thinks it’s for a Business, but you submit it as Personal, prepare for rejection.
That is it! We hope everyone enjoys your Snapchat Filter! Please share the app with friends and drop us a line about anything you love or things we can improve on.
Stay filtered my friends.